

Photoeye (Color-Mark Sensor) Drift: Ultimate Fix — Sensitivity or Position?
Photoeye Drift: The Ultimate Fix
Sensitivity or Position? Explained in One Article!
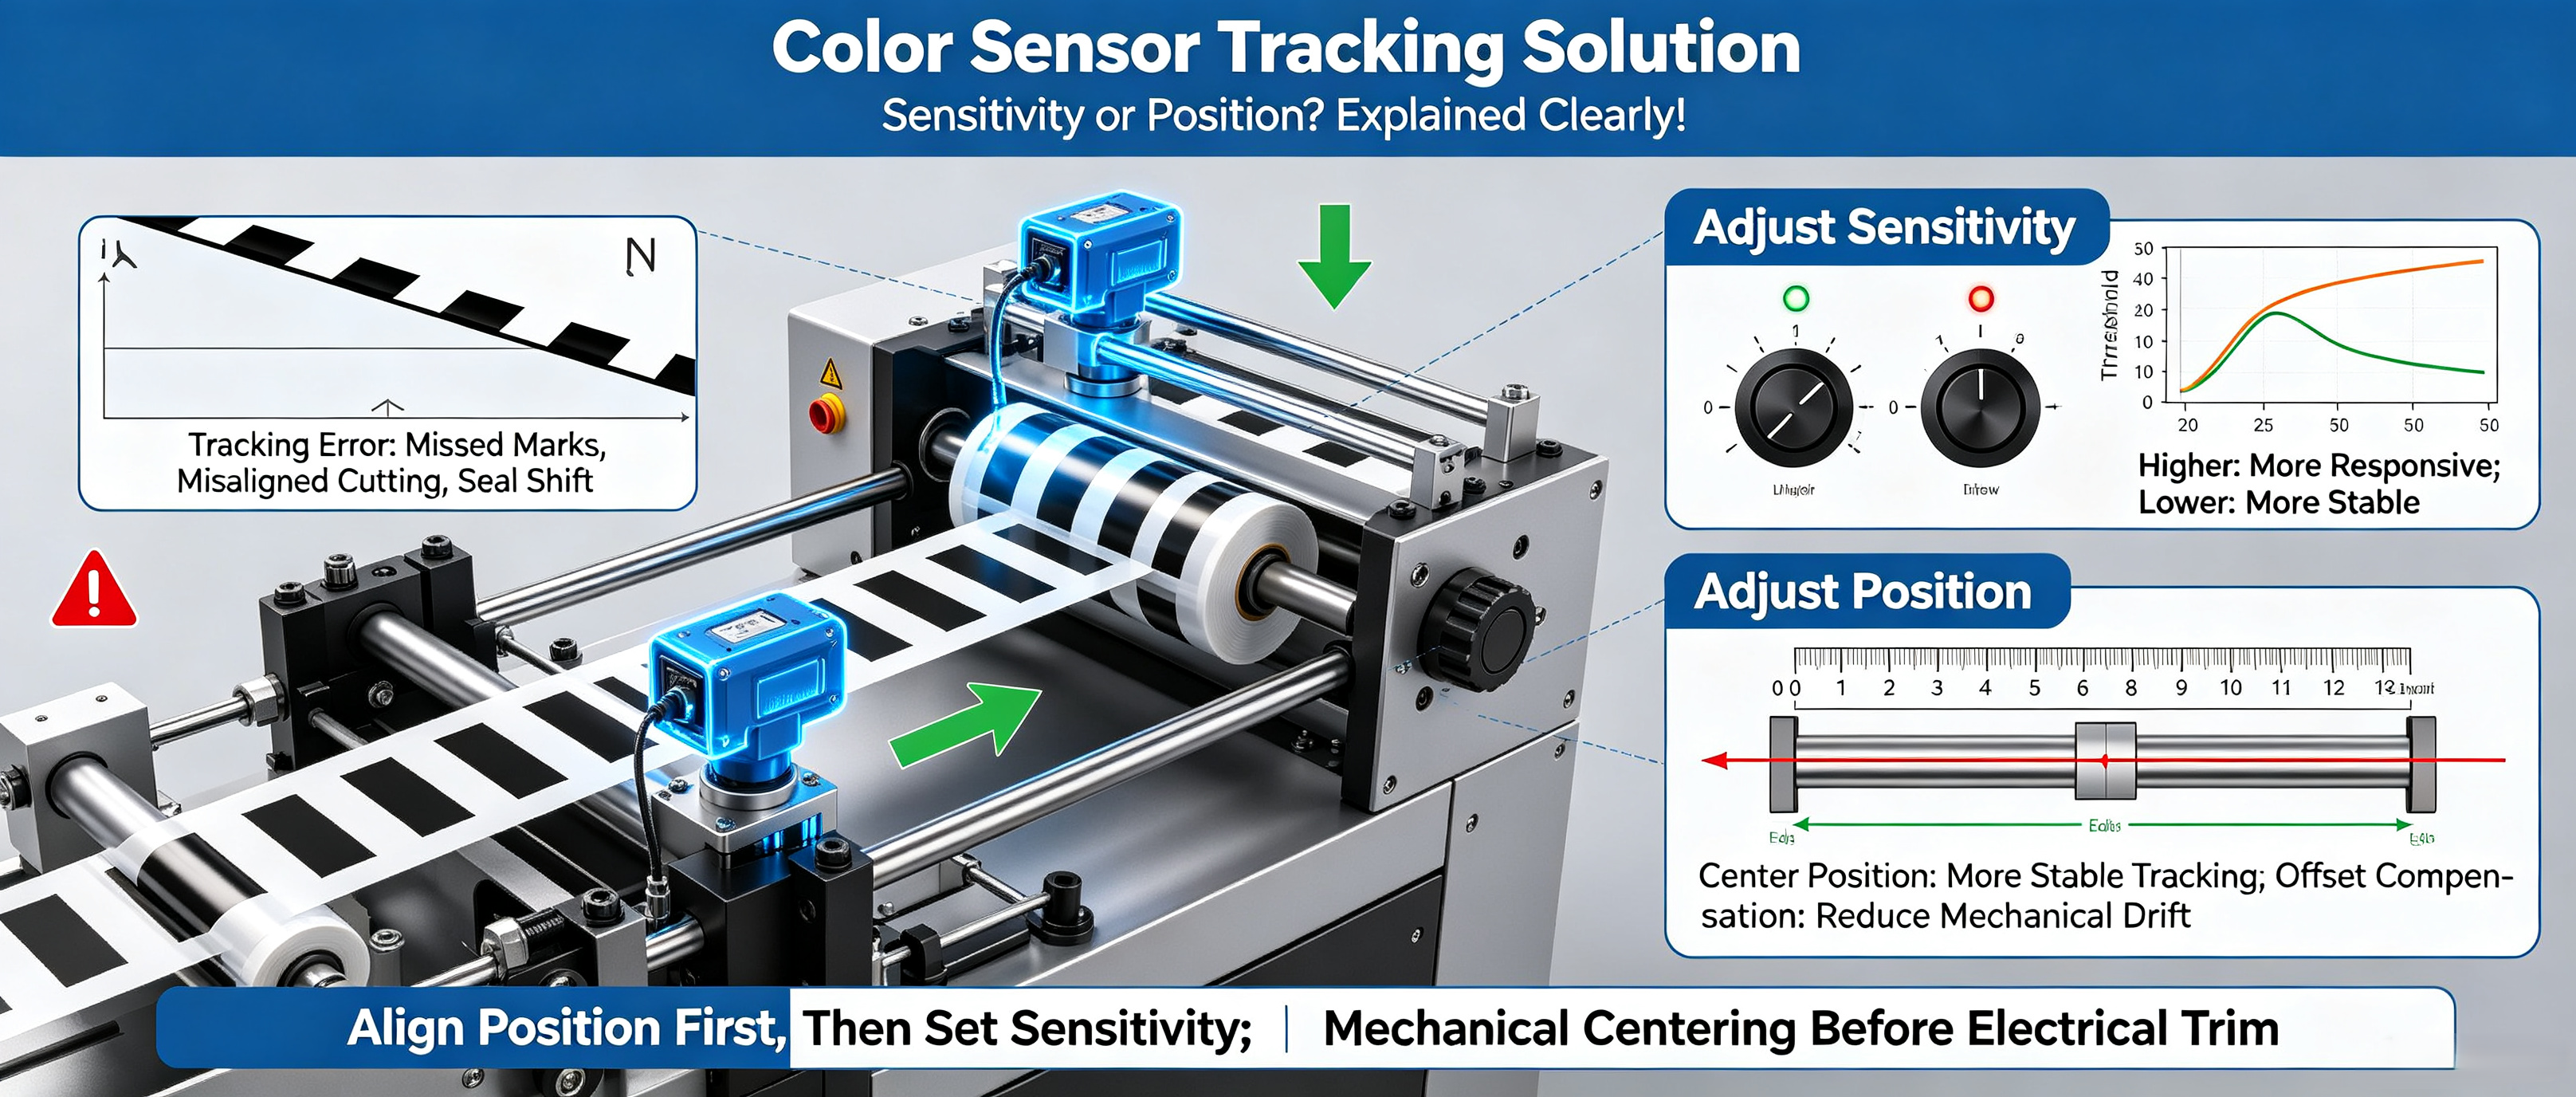
Production is running smoothly when the screen suddenly shows “color-mark photoeye fault” and the machine stops automatically. You open the guard — the photoeye looks exactly where it was, yet the bags just will not cut on the mark.
This is one of the most “mysterious” faults on a vertical packaging machine: photoeye drift. Today we break down the manual’s photoeye tracking system and answer once and for all: sensitivity or position?
1. First, Tell Apart: “Can’t See” or “Misreads”?
Photoeye drift is actually two completely different faults with different cures:
• Cause A: position off — the photoeye is not facing the mark on the film; it “can’t see” it.
• Cause B: poor contrast — the mark and the background are too similar; the photoeye “misreads” it.
The test is simple: when the mark is aligned with the photoeye, the light goes out; move it away and the light comes on. One glance tells you whether the photoeye is on target.
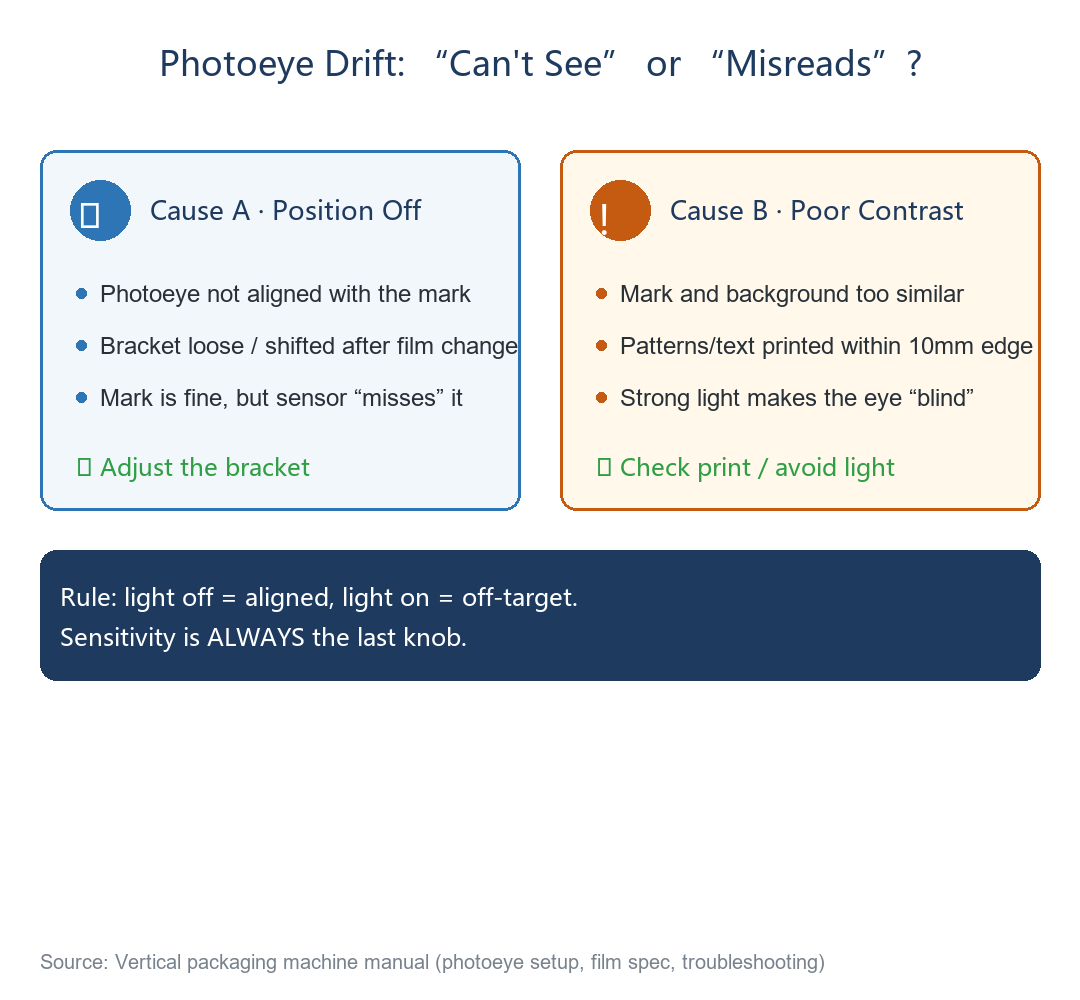

Fig. 1: Two-cause drift diagnosis (from the manual, photoeye setup & film requirements)
2. Position Off? The 3-Step Bracket Adjustment
“After the film length is set, adjust the color-mark photoeye and line up the cutter position — i.e. when the end-seal jaw halves close, the cutter cuts exactly at the film’s color mark.”
— Vertical packaging machine instruction manual — photoeye tracking system
The operation is only three steps:
• Loosen the lock handle so the photoeye track frame can slide left/right along the guide rail;
• Fine-tune the bracket: move it forward/back on its own rail until the photoeye faces the mark on the film;
• Tighten the lock handle and verify: light off when aligned, on when off-mark.
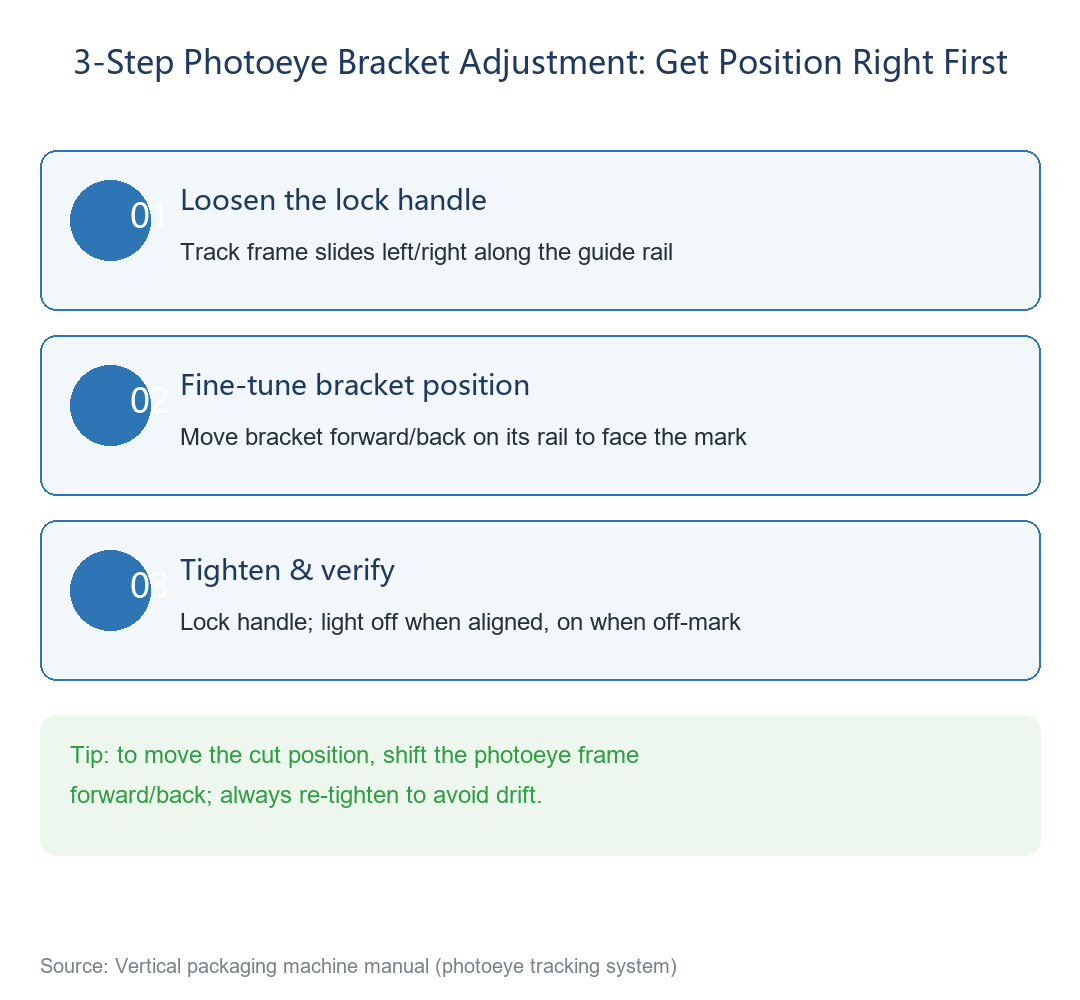

Fig. 2: 3-step photoeye bracket adjustment (from the manual, photoeye tracking system)
✔ To move the cut position, shift the photoeye frame forward/back; always re-tighten the handle afterwards so vibration cannot re-drift the sensor.
3. Poor Contrast? The Problem Is Usually the Printing
If the position is fine and the light behaves, but the bags still miss the mark, suspect the mark itself. The manual sets two hard requirements on the packaging film:
• The color mark and the background must have clear contrast — too similar and the photoeye cannot recognize it;
• No patterns or lettering within 10mm of the film edge — the background must stay clean.
⚠ Installing the machine where sunlight or strong light shines directly on it will make the photoeye fail. However bright your workshop is, keep the machine out of direct light.
4. The Sensitivity Knob: Always Last
Many veterans reach for the sensitivity knob first — that is the most common mistake. The manual’s order is: check the color mark for problems, adjust the distance between photoeye and film, or adjust the sensitivity knob on the photoeye.
The order matters: check the mark first, then the distance, and adjust sensitivity last. Skipping the first two and turning sensitivity is like adjusting a gun with your eyes closed.
5. Shop-Floor Quick Reference: Photoeye Drift Checklist
Here is the manual’s “photoeye drift” fault row turned into an executable checklist for downtime:
Table 1. Photoeye drift quick reference (from the manual, fault causes & fixes)
|
Fault |
Cause |
Fix |
|
Photoeye drift |
Bag length set inaccurately |
Re-set the bag length |
|
Photoeye drift |
Tension roller too dirty |
Clean dirt and black spots off the tension roller |
|
Photoeye not responding |
Mark problem / wrong distance / low sensitivity |
Check the mark; adjust the photoeye-to-film distance, or the sensitivity knob on the photoeye |
✔ Shop-floor self-check: when the mark is aligned with the photoeye, the indicator light goes out; move it away and it lights up. One glance tells you whether the sensor is on target.
Final Thoughts
Next time “photoeye drift” shows up, ask yourself three questions: Is the photoeye aligned? Is the mark contrast strong enough? Did you touch sensitivity? Get the order right and you solve half the problem.
Next article: the 2mm “life line” of the forming tube — why a skewed bag-forming tube ruins film feeding.
Call to Action & Series Note
Still fighting photoeye drift? Send us your film details (type, thickness, mark size) — our engineers will recommend the photoeye setup for your machine. Or reply with the keyword “manual” to download the Vertical Packaging Machine Instruction Manual (PDF).
This is Article 11 of the Vertical Packaging Machine Encyclopedia series. Subscribe to read the full 30-article collection.


